Web-based Administration
Using a forms-capable web browser you can administer your site's security configuration from almost anywhere. This chapter fully describes all the functionality offered using WebSentinel's web-based administration. Due to differences in how some browsers display HTML, the screen shots in this chapter may differ somewhat from what your browser produces but the functionality is the same.
You'll find that though these administration interfaces are all delivered through a web browser using standard HTML tables, much of the functionality is driven using windows, icons, and buttons much like the standard Mac OS interface. WebSentinel's web-based administration does not require Java or JavaScript support in order to work correctly - any web browser that supports forms is all that is needed.
Connecting to the Server
Before you can use the web-based admin, you must grant yourself access to it as
this is one of the areas of operation WebSentinel is pre-configured to protect.
Using WebSentinel Admin, grant yourself access to the "Plug-in Administration" realm
if you have not already done so. Launch your favorite web browser and request
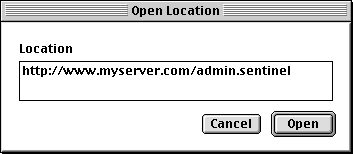
the following URL:

Figure 5.1: Connecting to the web-based admin URL.
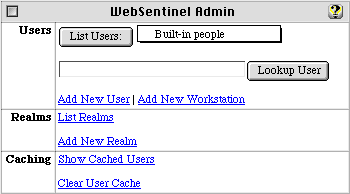
Enter your username and password when prompted and you will be presented with WebSentinel's main menu. This is the starting point for all operations performed with the web-based admin, and gives a summary of the features offered. Note that if you are connecting with a text-based browser such as Lynx or a browser that does not support tables, there is a text-only administration option.

Figure 5.2: The web-based admin main menu.
From this point you can create new, or modify existing, users and realms. The web-based admin does not offer the ability to create or work with groups, but you can assign group membership to users. The web-based admin also provides some insight into what is currently being held in WebSentinel's user cache as well as the option of clearing it, a feature not available with the standard admin application.
Managing Users
We'll start by deleting the test user we added in the
Introduction to WebSentinel chapter,
Elvis. Then, we'll add a new user and give them access to the Log Files realm. To begin,
click the "List Users" button on the main menu to see a listing of all users in the Built-in
people target.
After locating and clicking on the listing for our example user, Elvis, we are given the user detail window. The user detail window is similar to using the WebSentinel Admin application. User name and password, realm access, group membership, notes and its label can be set using this form.

Figure 5.3: The user detail window for Elvis.
In the realms and groups fields of a user's detail in the web-based admin all defined realms and groups are listed. Only the selected items are those the user has access to. Most web browsers allow multiple selections in these field listings by command-clicking on items. After making any changes to a user, clicking on the "Modify User" button will save any changes. Additionally, you can permanently remove the user by clicking on the "Delete User" button.
Since we want to show off the user creation features of the web-based admin, we'll delete Elvis from our user listing and then recreate him afterwards.

Figure 5.4: User deleted dialog.
After clicking "OK" in the dialog stating that Elvis has been deleted, you will return to the web-based admin main menu. From here, we can create a new user by following the "Add New User" link which yields an empty user detail window. After filling out the form with the new users info and setting their realm access privileges, simply click on the "Add User" button to save the new user.
Managing Realms
Managing your realms with the web-based admin is very similar to the process in which you work
with users. To modify or delete an existing realm, first click on the "List Realms" item at the
main menu.

Figure 5.5: Realms listing in web-based admin.
Clicking on any realm listing will allow you to modify the realm's configuration or delete it altogether. Note that the No Access File setting is a full path to the file on your server, including the volume name. All other settings match those offered in the WebSentinel Admin application. After making any changes, clicking on the "Modify Realm" button will save the realm.

Figure 5.6: Realm detail for "Plug-in Administration".
User Cache
The remaining two options available from the web-based admin main menu are "Show Cached Users" and
"Clear User Cache". These are offered for those who are interested in what is currently contained
in WebSentinel's user cache and isn't necessarily needed in order to use the product.
The cached user listing can be helpful if you would like a quick glimpse into who is accessing your site and which realms they have accessed.